

Whenever using an NSTableView in Xcode, automatically you receive an NSTableCellView having a single Text Field onto it. This can be used prototype cell like a beginning point to produce a custom Table Cell View. Within this publish, we’ll review the steps to create this up using Xcode 6.3.
Step One – Produce a new project in Xcode
Produce a new Quick project in Xcode:
Step Two – Layout the storyboard
You’ll have a project having a single storyboard (Primary.storyboard) and ViewController class (ViewController.quick). Change to Primary.storyboard and construct the NSTableView in order that it appears like this:
Choose the TableView in Primary.storyboard as well as in the attributes inspector, change the amount of posts to at least one.
Re-size the table in order that it fills the whole window and choose Editor > Resolve Auto Layout Issues > Add Missing Constraints. This can be sure that the table view will re-size together with all of those other window.
Step Three – Layout the Table Cell View
In step two, we set design on the table view so the table view were built with a single column, and resizes combined with the window. Within this step, we’ll set design on the table Cell View that’s displayed inside the single column on the table view.
Choose the Table Cell View in Primary.storyboard.
Within the Size Inspector, alter the Height on the table Cell View to 50
Give a Label underneath the Text View in order that it appears like this:
Visit the Attributes Inspector from the Label and alter its Text Color to manage Text Color. This can be sure that the text colour of the label can change once the row is chosen within the table.
Now visit the Size Inspector from the TableView and alter the Row Height to 50.
This can be sure that the table sets a row size comparable to the peak which was specified for that Table Cell View.

Step Four – Produce a custom class for that Table Cell View
In step three, we setup design in our custom Table Cell View with the addition of yet another label. To get data to show both in the written text Field and also the Label within the Table Cell View, produce a custom class by having an outlet for every field.
Select File > New > File. > Quick File
Save As: BPTableCell
Alter the source for BPTableCell.quick using the following class declaration:
Return to Primary.storyboard and choose the Table Cell View and visit its Identity Inspector. Alter the Class to BPTableCell.
Now visit the Assistant Editor view and make certain that BPTableCell.quick is shown on the best hands side.
Control-Drag the very first text field to BPTableCell.quick and fasten the opening
Control-Drag the Label to BPTableCell.quick and fasten the opening
BPTableCell.quick should now seem like this:
Step Five – Setup the NSTableView delegate and knowledge source
In step four we produce a custom class to back our custom Table Cell View. Within this step, we’ll setup our primary window’s View Controller in order that it may also behave as the table view’s delegate and knowledge source. In other words that ViewController.quick will result in telling the table view the number of rows to show and just what data to show in every row.
In Primary.storyboard, choose the TableView and Control-Drag it towards the View Controller and fasten both delegate and datasource outlets.

Step Six – Setup the Datasource and Delegate methods
In step five, we configured the vista Controller to do something because the delegate and knowledge source for the table view. Now we have to add some appropriate techniques to ViewController.quick in order that it implements the preferred conduct.
Change to ViewController.quick
Add some implementation of NSTableViewDataSource and NSTableViewDelegate towards the class declaration in ViewController.quick
Now, setup some data to show within the table
Finally, setup the delegate and datasource functions in ViewController.quick
Conclusion – Run the work
When running the work it ought to seem like this
After finishing this steps you’ll be able to:
- Alter the layout and add UI elements to some custom Table Cell View
- Produce a custom class to back the custom Table Cell View
- Bind the custom Table Cell View to the custom class
Bear in mind which you can use practically any mixture of UI controls inside a custom Table Cell View. If you are using a control which has a action instead of a power outlet, simply add an IBAction for your custom class – you’ll have use of the data that’s been certain to the class’ outlets.

 Writing today custom edition halo
 Custom college paper writing services
 Callpilot custom auto-attendant menu prompts for writing
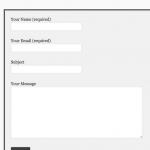 Custom contact forms styles of writing
 Are custom essay writing services legal steroids


