Visual Studio 2003
Note The Windows Service template and associated functionality is not available in the Standard Edition of Visual Basic and Visual C# . For more information, see Visual Basic Standard Edition Features or Visual C# Standard Edition Features .
The procedures in this topic walk you through the process of creating a simple Windows Service application that writes messages to an event log. The basic steps that you perform to create and use your service include:
- Create a project using the Windows Service application template. This template creates a class for you that inherits from ServiceBase and writes much of the basic service code, such as the code to start the service.
- Write the code for the OnStart and OnStop procedures, and override any other methods that you want to redefine.
- Add the necessary installers for your service application. By default, a class containing two or more installers is added to your application when you click the Add Installer link: one to install the process, and one for each of the associated services your project contains.
- Build your project.
- Create a setup project to install your service, and then install it.
- Access the Windows 2000 Services Control Manager and start your service.
To begin with, you create the project and set values that are necessary for the service to function correctly.
To create and configure your service
The New Project dialog box opens.
Note The project template automatically adds a component class called Service1 that inherits from System.ServiceProcess.ServiceBase .
In the next section, you will add a custom event log to your Windows service. Event logs are not associated in any way with Windows services. Here the EventLog component is used as an example of the type of components you could add to a Windows service. For more information on custom event logs, see Creating and Removing Custom Event Logs .
To add custom event log functionality to your service
- In the Solution Explorer. right-click Service1.vb or Service1.cs and select View Designer .
- From the Components tab of the Toolbox, drag an EventLog component to the designer.
- In the Solution Explorer. right-click Service1.vb or Service1.cs and select View Code .
- Edit the constructor to define a custom event log. To access the constructor in Visual Basic, expand the Component Designer generated code region.
To define what happens when the service starts
- In the Code Editor, locate the OnStart method that was automatically overridden when you created the project, and write code to determine what occurs when the service begins running:
You can also override the OnPause.

OnContinue. and OnShutdown methods to define further processing for your component.
To define other actions for the service
- For the method you want to handle, override the appropriate method and define what you want to occur.
The following code shows what it looks like if you override the OnContinue method:
Some custom actions need to occur when installing a Windows service, which can be done by the Installer class. Visual Studio can create these installers specifically for a Windows service and add them to your project.
To create the installers for your service
- Return to Design view for Service1.
- Click the background of the designer to select the service itself, rather than any of its contents.
- In the Properties window, click the Add Installer link in the gray area beneath the list of properties.
By default, a component class containing two installers is added to your project. The component is named ProjectInstaller. and the installers it contains are the installer for your service and the installer for the service’s associated process.
Security Note The LocalService account acts as a non-privileged user on the local computer, and presents anonymous credentials to any remote server. Use the other accounts with caution, as they run with higher privileges and increase your risk of attacks from malicious code.
To build your service project
- In Solution Explorer, right-click your project and select Properties from the shortcut menu. The project’s Property Pages dialog box appears.
- In the left pane, select the General tab in the Common Properties folder.
- From the Startup object list, choose MyNewService (for a Visual Basic project), or MyNewService.MyNewService (for a Visual C# project). Click OK .
- Press CTRL+SHIFT+B to build the project.
Now that the project is built, it can be deployed. A setup project will install the compiled project files and run the installers needed to run the Windows service. To create a complete setup project you will need to add the project output, MyNewService.exe. to the setup project and then add a custom action to have MyNewService.exe installed. For more information on setup projects, see Setup Projects. For more information on custom actions, see Walkthrough: Creating a Custom Action .
To create a setup project for your service
- On the File menu, point to Add Project. and then choose New Project .
- In the Project Types pane, select the Setup and Deployment Projects folder.
- In the Templates pane, select Setup Project. Name the project MyServiceSetup.
A setup project is added to the solution.
Next you will add the output from the Windows Service project, MyNewService.exe. to the setup.
To add MyNewService.exe to the setup project
- In Solution Explorer, right-click MyServiceSetup. point to Add. then choose Project Output.
The Add Project Output Group dialog box appears.
A project item for the primary output of MyNewService is added to the setup project. Now add a custom action to install the MyNewService.exe file.
To add a custom action to the setup project
- In Solution Explorer, right-click the setup project, point to View. then choose Custom Actions.
The Custom Actions editor appears.
The Select Item in Project dialog box appears.
The primary output is added to all four nodes of the custom actions — Install. Commit. Rollback. and Uninstall.
To install the Windows Service
- To install MyEventLog.exe. right-click the setup project in the Solution Explorer and select Install .
To start and stop your service
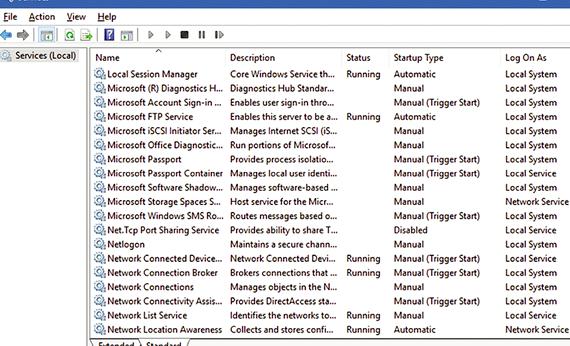
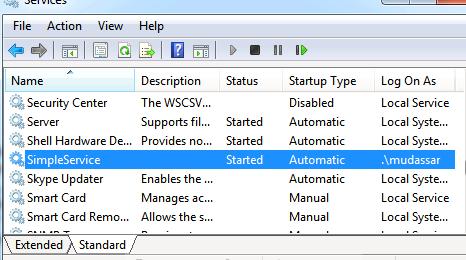
- Open the Services Control Manager by doing one of the following:
- In Windows 2000 Professional, right-click My Computer on the desktop, then click Manage. In the Computer Management console, expand the Services and Applications node.
Note In Windows NT version 4.0, you can open this dialog box from Control Panel.
You should now see MyNewService listed in the Services section of the window.
To verify the event log output of your service
Note The Servers node of Server Explorer is not available in the Standard Edition of Visual Basic and Visual C# . For more information, see Visual Basic Standard Edition Features or Visual C# Standard Edition Features .
To uninstall your service
- On the Start menu, open Control Panel and click Add/Remove Programs. and then locate your service and click Uninstall .
- You can also uninstall the program by right-clicking the program icon for the .msi file and selecting Uninstall.
Note If you installed the service on Windows 2000, you will need to reboot the system before you can reinstall the service. In Windows 2000, services are not completely deleted until the system is rebooted.
Next Steps
You might also explore the use of a ServiceController component to allow you to send commands to the service you have installed. For more information on using the ServiceController component, see Monitoring Windows Services .
You can use an installer to create an event log when the application is installed, rather than creating the event log when the application runs. Additionally, the event log will be deleted by the installer when the application is uninstalled. For more information, see Walkthrough: Installing an Event Log Component.


 Contract administratif et service public dissertation topics
 Ontology-based semantic web services clustering in writing
 Online editing services writing on the wall
 Essay writing service reliable toyota
 Article writing service for sale


